The main reason why I am posting some webpages about fixing a Vintage Camp Trailer is because I want to show women that if I can buy and fix a Vintage Camp Trailer.. so can you! Men can come along for the ride too but I wanted to write a post from a woman’s point of view.
Fixing things around the house, truly isn’t my strength but I at least try, and sometimes I give up and hire the work to be done or ask for help. With that in mind, my past history played a big part in the decisions that I made in purchasing a Vintage Camp Trailer. This page is going to tell you about how I selected the trailer and then at the bottom of the page I will put links to the different things that I did to fix the trailer.
I first needed to decided what I was going to do with the trailer and if the work was worth it. I came up with 3 different reasons why I wanted a camp trailer. 1) First and most importantly, I knew I wanted to make a series of 4-5 Outdoor Cooking/Emergency Preparedness classes and I could use the trailer as a back drop for the classes and take the trailer anywhere. 2) I wanted to go camping with my son and 3) I found a woman’s group called “Sisters on the Fly” and I decided that since I can’t find a Single Man to go camping with me I would just join the women. Those were the Pros in my decision but the Cons of buying a trailer were.. I had never pulled a camp trailer before and I was very intimidated!! I have pulled a Uhaul trailer before and already knew that backing up a trailer is something I am not very good at. I have gone camping most of my life and I love it.. but I seriously had never set up a trailer nor did I know how to start the water heater, fridge, heater, etc. Know this is not a strength of mine, I had to ask the question…Could I over come these fears??
Before You Buy A Camp Trailer
1) DO YOUR RESEARCH! I began doing some research on how to fix up Vintage Trailers so I would know what I was getting myself into. This step was not only the most important step I took, but it helped me pick out the right trailer! I learned two important facts 1) don’t buy a trailer that has water damage because I am not skilled enough to repair that kind of damage and 2) make sure the roof is in good condition. When I was doing my research the following youtube video was very helpful. How to Spot a Lemon when Buying an RV
2) KNOW WHAT YOU WANT AND NEED. I love the look of the 50s-60s trailers but most of them don’t have a bathroom and I knew that was more important to me. I also knew I wanted a trailer with a good fridge and heater, etc and that I didn’t want something so old that I felt like I was tent camping. Buying a 1991 trailer turned out to be a good decision because I learned that a lot of people don’t know they are supposed to redo the seals on the trailer and my 26 year old trailer was just starting to get water damage.
3) KNOW HOW MUCH WEIGHT YOUR VEHICLE CAN PULL. Check with your vehicle manufacturer to see how much weight you can pull. Learn the difference between the Tongue weight and Gross weight and how to distribute weight when you pull a trailer. After you know how much weight you can pull, don’t take the word of the seller about how much the trailer weights. Do some research on the year/make and model of the trailer that you find to make sure you know the correct weight.
4) FIND A REPAIR SHOP THAT FIXES VINTAGE TRAILERS. There are a lot of places that repair trailers but the key here is to find one that fixes Vintage Trailers. The main problem with Vintage trailers is trying to find parts and you want to find a business that knows what to do if they can’t find the part. In the Salt Lake City, Utah area the trailer repair business I found was “Best Way Trailers” located in West Valley. They are so awesome to work with! I called them before buying a trailer to see if they would inspect a trailer before I purchased it. I also had them help me select the right hitch for my Toyota 4Runner and they installed it. When I found my trailer I asked the seller to pull it to Best Way Trailers so they could inspect it. The seller wasn’t very happy about it because he knew anyone would buy a trailer that size. 19 foot trailers are in big demand in Utah. If I could have pulled something larger than a 19 foot trailer I could have purchased something a lot cheaper and bigger, but it seems most people are looking for the size of trailer I bought. Every time I would make an appointment to go look at a trailer the seller would sell it out from under me and it was gone before I even could look at it. I was glad I did my research and knew what to look for because I had to make a fast decision.
One thing I learned when I was sitting in Best Way Trailer’s waiting room was that I wanted to start with an Aluminum Roof. Someone walked in the business just head of me and he asked about repairing the roof on his trailer. I learned that a roof made of EDPM rubber needs replaced about every 10 years and Best Way trailers said it only costs a little bit more to replace his roof with Aluminum and he wouldn’t have to replace it again. It was that day that I decided to buy a trailer that already had an Aluminum Roof.
When I was doing my research I copy and pasted some information into a word document and I didn’t keep the link where I found the information (otherwise I would give the gentleman credit for his webpage). His site was very helpful so I am going to copy and paste some of his tips here that he wrote about knowing if the roof is in good condition:
A few tips:
1. Most entry priced trailers will have a roof made of EDPM rubber. These trailer roofs need maintenance each 1 to 2 years. Cleaning and removing old caulk and resealing with Dicor self-leveling caulk. But SILICONE IS A NO-NO!
2. The EDPM rubber has a white coated finish. If that white coating is dry, crackly, chalky, or grainy, the coating needs to be power-washed off and re-coated.
3. Corners are usual suspects for roof leaks. Go to each corner of the roof with your ladder and gently press down on the roof in a few areas. If the roof feels soft, spongy there has been damage to the wood already.
4. Look across the roof for low spots that might pool water. If it has an A/C unit on top, make sure the roof doesn’t sag there. That’s an easy spot for a leak. Look for seams in the middle of the roof. The roof was put on as one piece. Seams mean there has been partial repairs.
5. The caulking that seals all edges and vents and metal pieces on the roof is a self leveling compound (Dicor is most common brand). If you see silicone on the roof there is likely a problem. If you see sloppy gobs of any sealant there has been and may still be a problem. Look to see that the sealant edges appear to be stuck down like they flowed onto the roof. If they look like the caulk has shrunk away at the edges, or if it shows signs of cracking it is old and should have been replaced already.
One of the tips I learned along the way is to inspect the inside of the trailer in the corners for water damage. In the trailer that I found, there were cracks in the wood paneling inside that were under two of the windows. It looked like water had gotten inside of the wall and expanded when it froze and cracked the wood paneling. The owner claimed he fixed it but all he did was put silicone around the outside of the window. This was the only red flag I had so I felt like the trailer was in good enough condition that I asked the seller to take it to Best Way Trailers for an inspection.
After the inspection the employee pulled me aside away from the seller (because he was representing me, not the seller) He told me that a common thing that happens with trailers is the box (the top, walls and roof) separates from the frame of the trailer (close to the tongue). It happens when the trailer is moving down the road because the trailer rocks back and forth. He said If I have them fix something like that it would cost about $2,000. They have to lift the skin of the trailer, (siding) and look to see how much repair the trailer would need. He talked to the seller about this issue and the seller explained he had put a metal plate inside the front by the tongue of the trailer to help secure this and stop the box from separating. My only thought about this subject is that if this is a common problem then I was glad I understood this is an issue and that I will have to deal with this subject on about any trailer that I buy.
After I started taking out the windows and putting new butle tape I realized a good tip to share with you is to take a screw driver with you when looking to buy an older trailer and remove a few screws from the trailer. It seems pretty normal for the screw heads to rust if they weren’t painted. The head of the screw might look very rusty (along with the top of the screw shank) and you’ll think there is probably water damage, but to see how sever the water damage is in the walls, take the screw out until you start seeing silver. The screw will kind of give you an idea.how deep into the trailer the water damage is. The only rusty screws I found were just those 2 windows that had a little bit of water damage on the paneling inside. The screw weren’t rusted all the way down the shank of the screw, but only about half way. When I took the window completely out there wasn’t even any mold on the wood and it was in good shape and I didn’t have to replace any of the wood.
I also wanted to share that everyone I talked to, that works in the industry to repair camp trailers. all said they personally would never own a newer trailer because they are not made as well as the older trailers. I have to respect their opinion because they are the ones who repair trailers all day. I learned the roofs and siding have more upkeep on newer trailers. We have a friend of our family who pulled his 10 year old trailer on the interstate and the siding started coming off. He had to stop in the next town and screw the siding back down so he could get the trailer home. (then he had to file an insurance claim). My son who helped me remove the corner beads on my trailer said his friends trailer didn’t have staples in the siding as close as the staples were in my trailer. He observed his friends trailer had staples every 3-4 inches and that my trailer staples were about every inch…. Im just saying do your homework and read reviews on the newer trailers before you buy one.
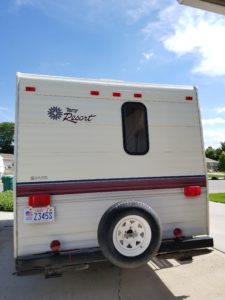
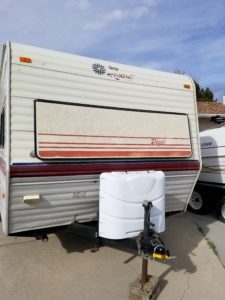
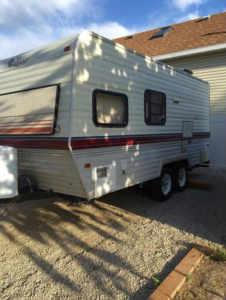
I learned the whole secret to keeping a vintage trailer in good condition is to replace all of the butel tape on the vents, windows, corner beads, doors, etc about even10 years. In the following webpages I will teach you how I did those steps and how I updated my vintage trailer… but first here are some pictures of my trailer before I began the journey.


Submit your review | |
Every thing you have done is awesome looking so cute
Thanks Carol 🙂

